Integrating Stripe Payments with JTL-Shop 5: Installation, Configuration, and Best Practices
Stripe Integration for JTL-Shop 5
This documentation provides a step-by-step guide to integrating Stripe as a payment solution within your JTL-Shop 5 store. It covers the installation process, configuration of API keys, payment methods, and advanced features like Express Checkout and Wallet setup.
1. Installation
To begin, install the official Stripe plugin compatible with your JTL-Shop 5 version. You can obtain it from your JTL extention store here: https://www.jtl-software.de/extension-store/stripe-jtl-shop-5 Follow these steps:
- 1.Book a plugin on JTL extention store: https://guide.jtl-software.com/jtl-shop/shop-erweitern/extension-store/
- 2.Install plugin on your JTL-Shop admin
- Activate the plugin and confirm that it appears under installed payment modules.
2. Configuration
2.1 API Keys
To connect your JTL-Shop with Stripe, you’ll need your API keys:
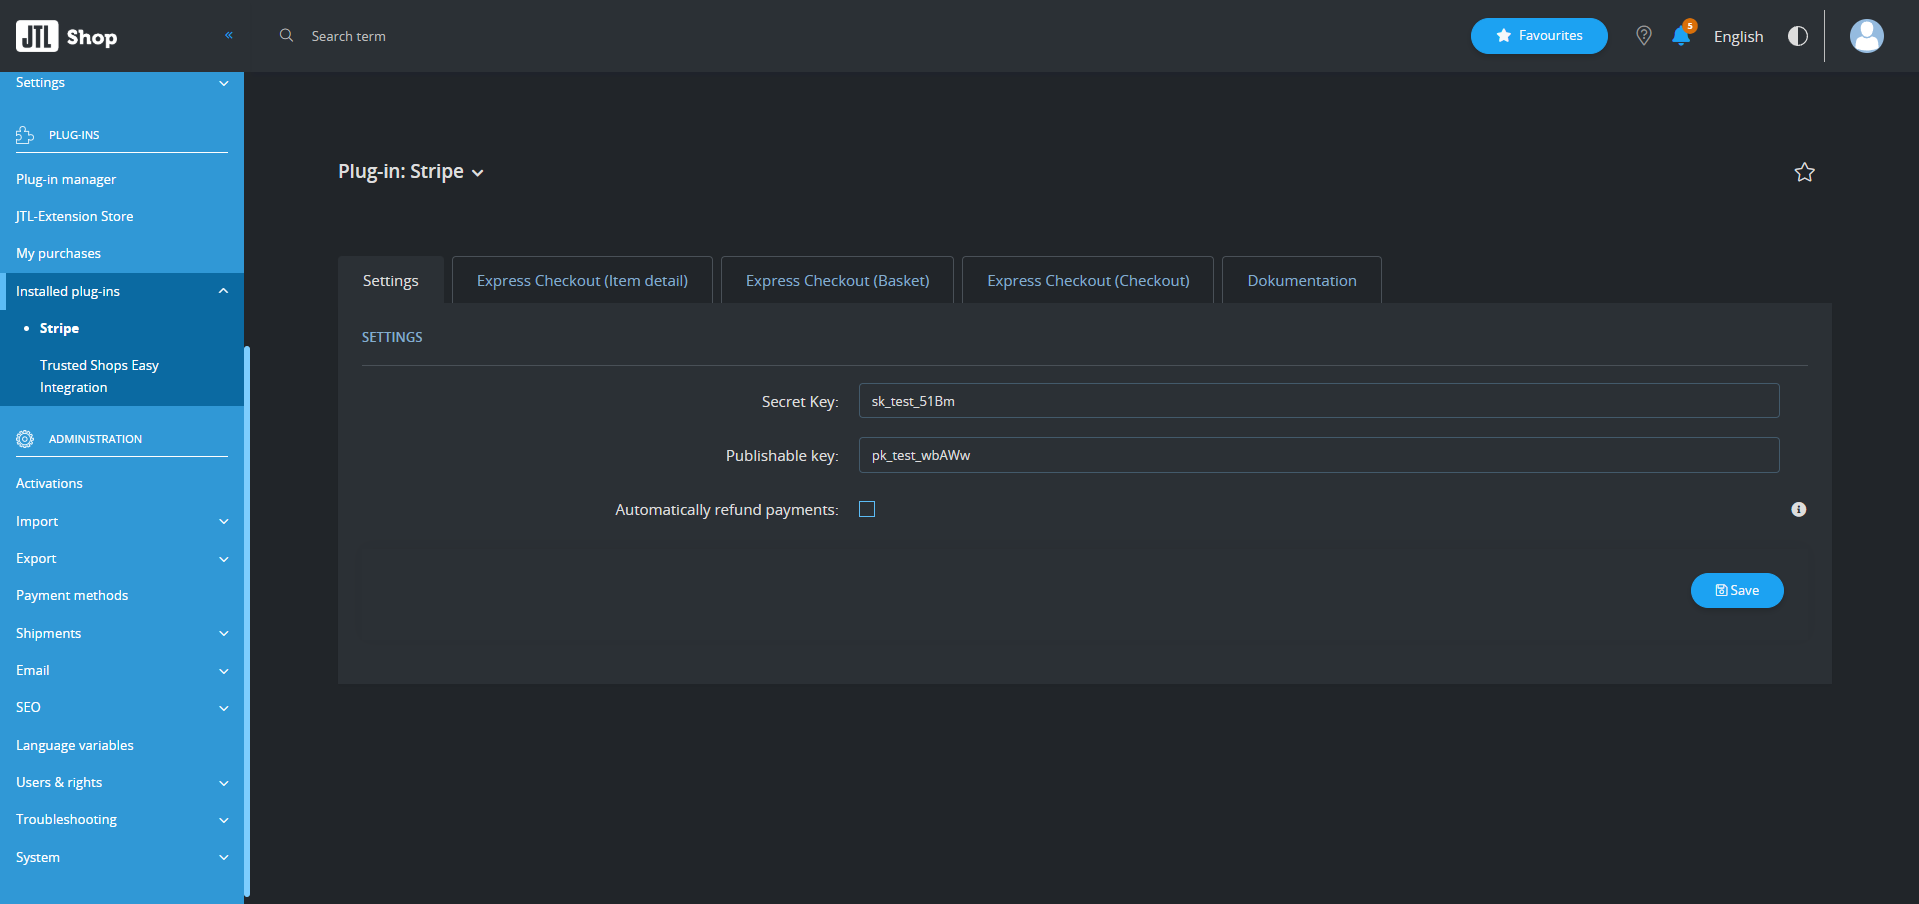
- Log in to your Stripe Dashboard.
- Navigate to Developers → API Keys.
- Copy your Secret Key and paste it into the corresponding field in the configuration section.
- Copy your Publishable Key and paste it into the corresponding field in the configuration section.
Tip: Use test keys for sandbox environments before switching to live mode. More information you can find here: https://docs.stripe.com/testing/overview
2.2 Payment Methods Configuration
You can manage and enable payment methods in both Stripe and JTL-Shop. Ensure that the same payment methods are activated or deactivated in both systems for consistency.
Note: If a payment method is enabled in the JTL-Shop admin but not in your Stripe account, it may still appear and function in the shop.Some Stripe payment methods are displayed only when specific conditions are met, such as the customer’s country, currency, or operating system.
First, activate your desired payment methods directly in your Stripe Dashboard. You can follow the official Stripe documentation for detailed instructions: Enable Payment Methods .
For wallet-based payment methods such as Amazon Pay, Apple Pay, Google Pay, and others, you’ll also need to register your domain in your Stripe account to verify ownership and enable wallet functionality.
You can find a step-by-step guide on how to register your domain here: Register Your Domain for Wallet Payments .
Below is the complete list of payment methods supported by the Stripe integration in JTL-Shop. These methods are automatically created and activated after the Stripe plugin installation.
- Stripe Alipay
- Stripe Amazon Pay
- Stripe Bacs Direct Debit
- Stripe Bancontact
- Stripe BLIK
- Stripe Card
- Stripe EPS
- Stripe iDEAL
- Stripe PayPal
- Stripe Klarna
- Stripe Przelewy24
- Stripe SEPA Direct Debit
- Stripe SOFORT
- Stripe TWINT
- Stripe WeChat Pay
To make these payment methods visible during checkout, they must be assigned and activated for corresponding shipping methods. You can find detailed instructions on how to configure this in the official JTL-Shop documentation: Configure Shipping Methods in JTL-Shop .
2.4 Express Checkout (Item Detail Page)
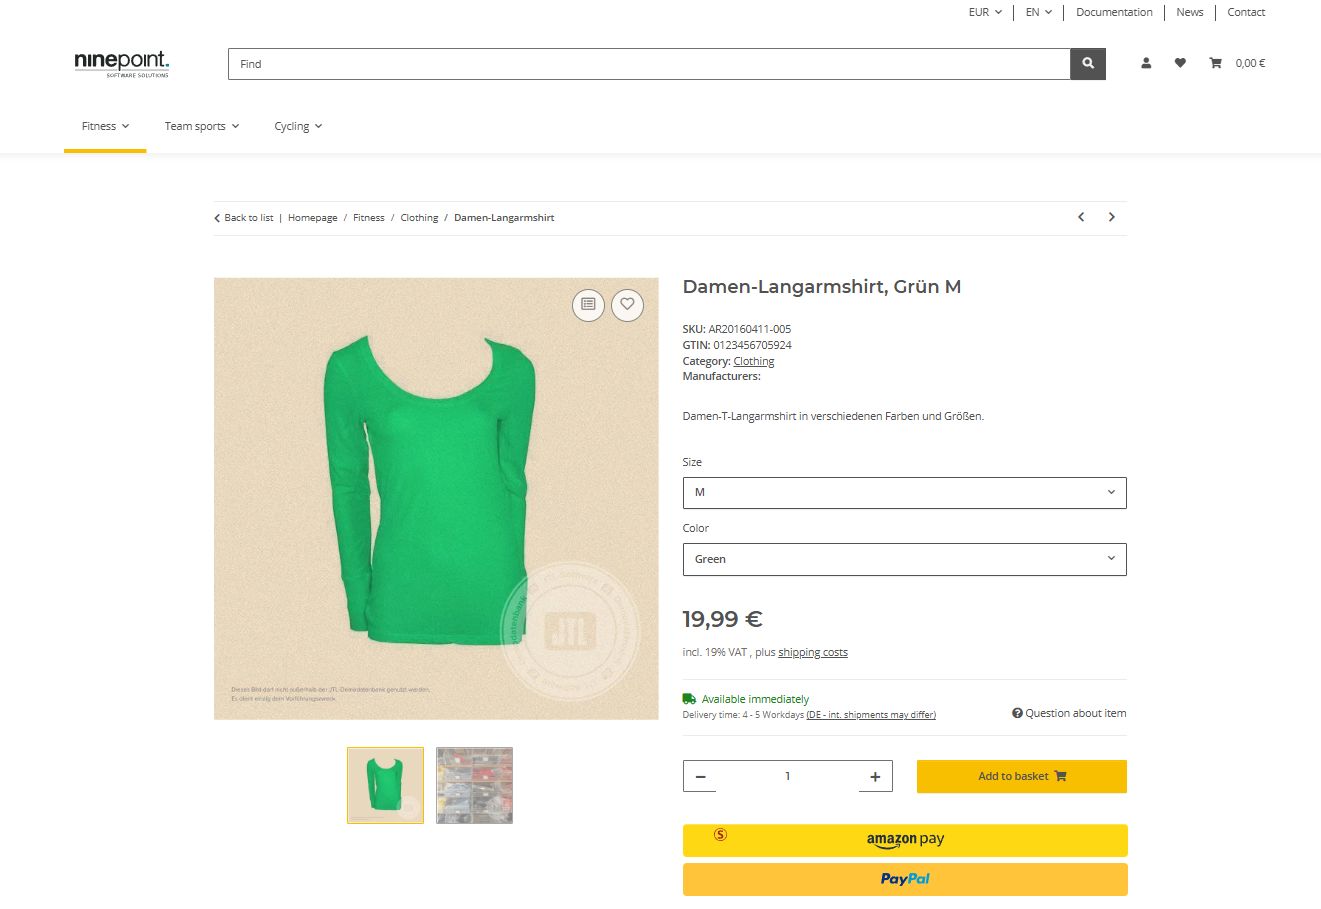
Express Checkout allows customers to complete their purchase directly from the product page. This provides a secure and seamless buying experience, as customers do not need to manually enter their billing or shipping details — this information is automatically retrieved from their digital wallet on the device they are using.
Implementing Express Checkout can significantly speed up the purchasing process and help increase your store’s conversion rate.
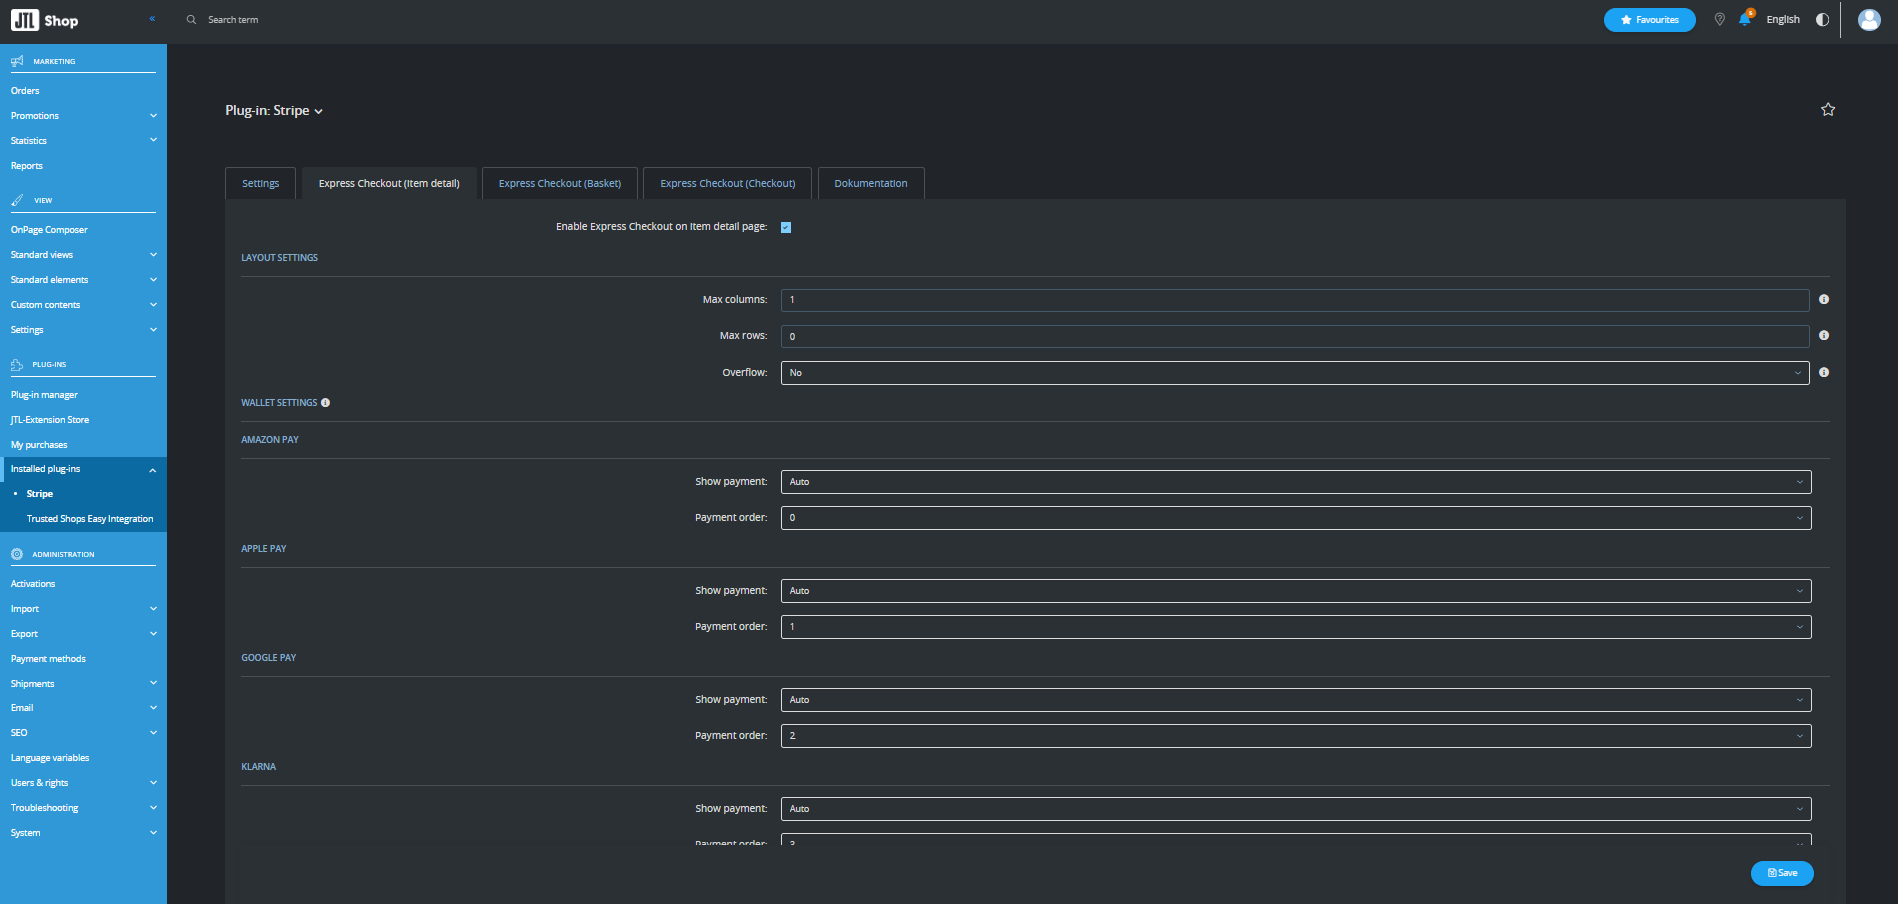
In the plugin settings, you will find this configuration under the tab (2.4 Express Checkout – Item Detail Page).
Within this section, you can configure the following options:
- Enable or Disable the Express Checkout button for the Item Detail Page.
-
Enable or Disable Specific Wallets: Under the Show Payment option, you can choose:
- Auto – The wallet button will be displayed if the customer’s browser supports it and the payment method is enabled in your Stripe account.
- Never – The wallet button will not be displayed.
-
Adjust Layout: Define how the wallet buttons should appear on the Item Detail Page, including the maximum number of columns and rows.
You’ll find identical configuration options under the tabs Express Checkout (Basket) and Express Checkout (Checkout). This allows you to customize wallet availability and button layouts separately for each section of your shop, providing maximum flexibility and control over the checkout experience.
3. Webhooks
After saving the configuration, the plugin will automatically create or update a webhook in your Stripe account. Webhooks are essential for certain payment methods, such as SEPA Direct Debit, as they enable automatic updates of payment statuses — for example, when a payment is received or when a customer cancels a transaction.
You can view and manage your webhooks directly in your Stripe Dashboard.
4. Support
If you have any questions or require technical assistance, please don’t hesitate to contact our support team at support@ninepoint.solutions.
TIPS:
- We recommend testing the Stripe plugin in the Sandbox environment before going live. This allows you to simulate the complete customer experience end-to-end without using real money. You can find detailed instructions on how to set up Sandbox and Test Mode here: Stripe Sandbox Setup Guide.
- Stripe provides full flexibility for testing all possible payment scenarios. You can access test card numbers, test IBANs for various banks, authorization methods, and more in the official documentation: Stripe Testing Guide.
- For improved accounting and transaction tracking, the plugin automatically stores the JTL-Shop order note in the payment’s metadata on Stripe. This makes it easy to map transactions between your JTL-Shop orders and Stripe payments.